Auto-cut tool, as well as manual-cut tool, is like scissors. When it is applied on a region traversing end to end of it, it will cut the region into two parts and will drop the smaller part. But unlike real scissors, it will also cut empty region (or background), which will bring back sliced area into foreground. 자동 자르기와 수동 자르기 사용법은 실재 가위를 사용하는 것과 유사합니다. 이미지 영역을 가로질러 자르면 잘려진 영역이 두 개의 조각으로 나뉘게 되고 그 중 큰 부분을 남기고 작은 부분을 버리게 됩니다. 배경 영역을 자르면 잘려진 부분중 작은 부분이 전경(foreground)으로 바뀝니다.
1. Prepare image to be cut out: 1. 자르고자 하는 이미지를 준비합니다:

2. Draw cutting line along the boundary of the first object. This will cut-out the first object at the nearby boundary. 2. 첫번째 개체의 경계를 따라 자름선을 그리면 자름선의 가까운 경계를 따라 오려집니다.

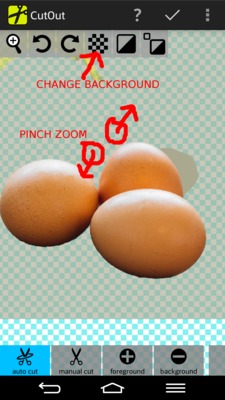
3. Change background color and use pinch zoom to see better whether cutting line is OK. 3. 자르기가 잘 되었는지를 확인하기위해 배경색을 바꾸거나 확대해 볼 수 있습니다.
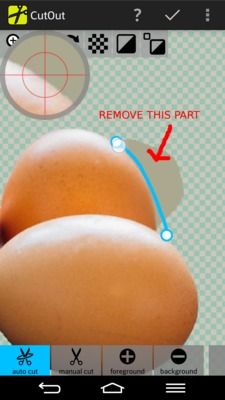
4. Refine cut-out by redrawing cutting line both on foregroud and background regions. Cutting line on foreground region will remove sliced part into background, and cutting line on background region will bring back sliced part into foreground. The default behavior of taking sliced part can be reversed by using "invert-last" button. 4. 잘려진 영역 주위로 다시 잘라 다듬기를 할 수 있습니다. 전경(foreground)에서 잘려진 부분은 배경(background)으로, 또 배경(background)을 따라 잘려진 부분은 전경(foreground)으로 바뀝니다. 잘려진 부분의 전환 기능을 반대로 할려면 "마지막 자르기 반전" 버턴 설명을 참조하십시오.
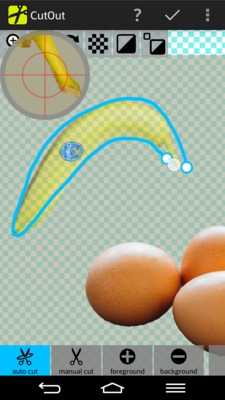
5. Draw cutting line along the second object, if exists, to bring it into foreground. 5. 추가할 개체가 있으면 그 개체를 따라 자름선을 그리면 마스크가 배경에서 전경으로 전환됩니다.
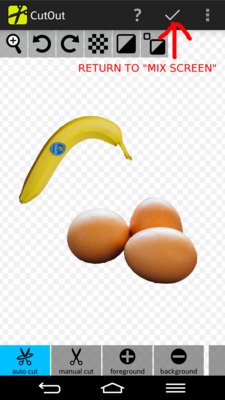
6. Save result and return to mix-screen. 6. 결과를 저장하고 합성화면으로 돌아갑니다.